How to Cook Thin Chicken Breast in an Air Fryer Guide
Adapting to modern kitchen technologies can be an exciting journey, particularly when it involves a device as innovative as the air fryer. Known for its health advantages and versatility, the air fryer has revolutionized the way we prepare our meals, especially favorites like thin chicken breast. Through this guide, you’ll delve deep into the fascinating world of air frying, starting with a thorough understanding of how the device works and the numerous benefits it offers. From there, you’ll learn how to prep your chicken correctly, creating a palate-pleasing, juicy, and well-seasoned air-fried chicken.
Understanding Air Frying
Understanding Air Frying
Air frying is a cooking technique that’s considered a healthier alternative to deep frying. An air fryer operates by circulating hot air around the food to create a crispy exterior, closely mimicking the texture that deep frying provides. However, it uses less, or even nearly no, oil, making the results less calorific and fatty.
Benefits of Air Frying
The benefits of air frying extend beyond its health attributes. First, it cooks faster compared to traditional ovens or stovetops, making it a great option for quick meals. Second, it’s versatile and can cook a variety of foods, from vegetables to meat, including thin chicken breasts. Finally, because it uses less oil, the cleanup process is often quick and easy.
How Air Frying Works
Air fryers work by circulating hot air around the food, making the exterior crispy while leaving the interior tender. They contain a small fan that circulates the hot air at high speed, creating a convection effect that heats and crisps up the food quickly and evenly.
Learning the Features of Your Air Fryer
If you want to cook thin chicken breasts, knowing your air fryer’s features is essential. Most air fryers have temperature control, allowing you to adjust the heat as required by the recipe. This can range from mild temperatures ideal for slow cooking to higher settings suitable for frying or roasting. Additionally, check the capacity of your air fryer’s basket. Knowing its capacity will ensure you don’t overcrowd the basket, ensuring even cooking.
Cooking Thin Chicken Breasts in an Air Fryer
When it comes to cooking thin chicken breasts in an air fryer, the cooking time will depend on how thin they are. However, generally, a piece of thin chicken breast should be cooked at 375 degrees Fahrenheit for around 10 minutes. It’s essential to ensure the internal temperature of the chicken reaches 165 degrees Fahrenheit – this indicates the chicken is fully cooked and safe to eat.

Thin Chicken Breast Preparation
Cleaning and Preparing Your Thin Chicken Breast
First, you should thoroughly clean your chicken breasts under cold running water. Dry them off with a paper towel, ensuring all excess moisture is removed as this can affect the cooking process. If the breast is thick, you can choose to slice it horizontally into two thinner cuts to allow for faster and even cooking.
Bringing Your Chicken to Room Temperature
Before cooking, it’s essential that chicken breasts are at room temperature. If they’re cold, they will take longer to cook, which may result in uneven cooking. Therefore, remove your chicken breasts from the fridge 15-30 minutes prior to prepping them for the air fryer. Remember, your chicken should not sit out for longer than two hours, as per USDA guidelines, to prevent bacterial growth.
Seasoning Your Thin Chicken Breast
Properly seasoning your chicken breast will greatly enhance its flavor. You may use whichever seasoning you prefer. However, some of the best-recommended seasonings for air fryer chicken include salt, black pepper, smoked paprika, garlic powder, onion powder, and oregano. A dash of olive oil mixed with these seasonings can often help them stick better.
For a minimalist approach, simply drizzle some olive oil on the chicken breasts, followed by a generous sprinkle of salt and pepper.
To increase the flavor profile, you can marinate your chicken in a marinade of your choice for at least 30 minutes to two hours before cooking. A good marinade can be a simple mix of olive oil, lemon juice, minced garlic, dijon mustard, honey, salt, and pepper.
Cooking Your Thin Chicken Breast In the Air Fryer
The cooking time for your thin chicken breast depends on the size and thickness of the cut. For an average-sized thin chicken breast, set your air fryer at 375 degrees Fahrenheit. If your air fryer doesn’t require preheating, you can pop your chicken right in.
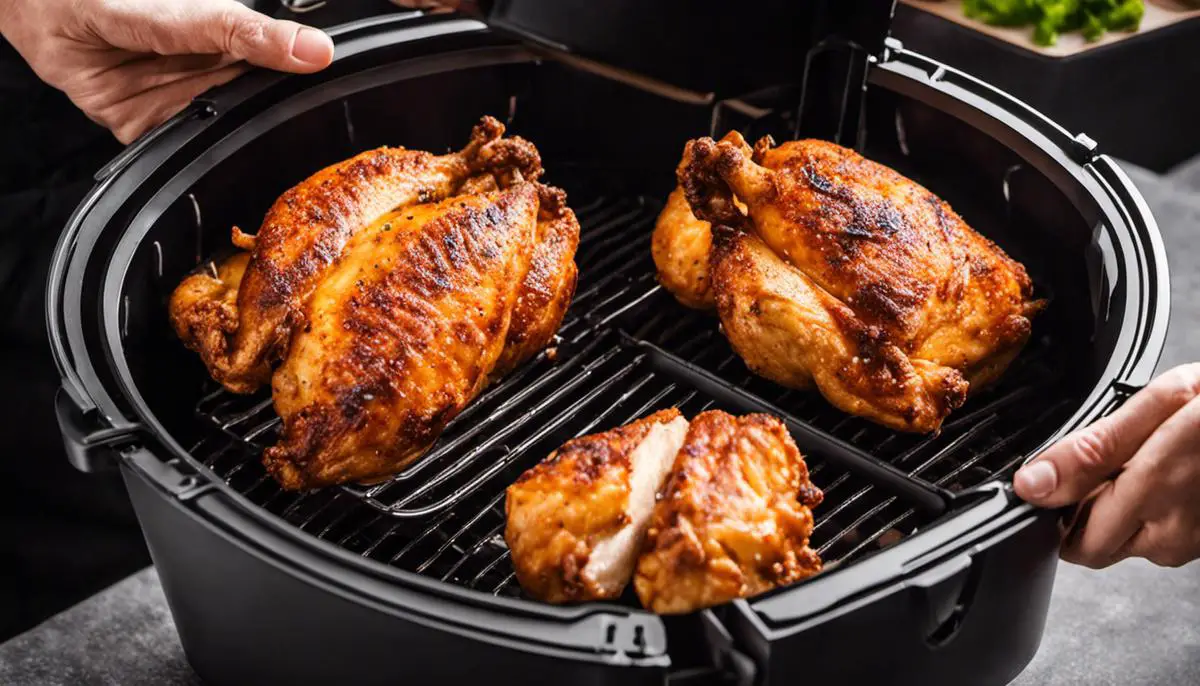
Place the seasoned chicken breasts in the fryer basket, making sure they don’t overlap, and cook them for about 10-12 minutes. Again, this time frame can slightly vary based on the exact size of your chicken breasts, but this should give you a general idea. Remember to flip the chicken halfway through for an evenly cooked and golden-brown crust.
Always check your chicken’s internal temperature using an instant-read thermometer before serving. According to USDA guidelines, chicken is safe to eat when it reaches an internal temperature of 165 degrees Fahrenheit.
Review of Seasonings for Air Fryer Chicken
The best seasonings often come down to personal preference. However, some top-rated options worth considering include:
- McCormick Grill Mates Chicken Seasoning: This ready-made blend of spices brings both smokey and sweet flavors to your chicken.
- Lawry’s Chicken & Poultry Rub: A versatile rub that can be used on any type of poultry. It has a mix of garlic, onion, and paprika.
- Badia Sazon Tropical with Coriander & Annatto: Ideal for those who enjoy a touch of Latin American flavor, this spice mix adds depth to your chicken with its unique blend of ingredients.
Remember, whichever seasoning you choose, the key to tasty chicken is in the air frying process that locks in flavors and makes the outside crispy while keeping the inside tender and juicy.

Air Frying Thin Chicken Breast
Finding the Correct Temperature and Time for Cooking a Thin Chicken Breast
The first step towards achieving golden brown and perfectly cooked thin chicken breasts involves setting your air fryer to the correct temperature and cooking time. For thin slices of chicken breast, the general recommended setting is 375 degrees Fahrenheit (or approximately 190 degrees Celsius). As for time, due to the thinness of the breasts, you would only need to cook them for about 10-12 minutes. However, remember that this may vary slightly from one air fryer brand to another, so it’s always advisable to check your appliance manual for specific instructions.
Placing the Chicken in the Air Fryer
Once the temperature and time settings are in place, the next step is to arrange the thin slices of chicken breast in the fryer basket. To ensure even cooking, the chicken slices should be arranged in a single layer, with sufficient space between each piece. Overcrowding the basket could result in unevenly cooked and soggy chicken slices. Besides, a well-arranged basket allows for an easy turnover midway through the cooking process.
When and How to Flip the Chicken
You’ll need to flip your chicken halfway through its cooking time to achieve an evenly cooked and crispy result. So, if you’re cooking them for 10 minutes, you should flip the chicken at around the 5-minute mark. Use a pair of tongs for this purpose to carefully turn each chicken piece. Again, remember to exercise caution while doing this to avoid any possible burns.
Checking if the Chicken is Fully Cooked
The final step is to check if your thinly sliced chicken breast is fully cooked before consumption. One accurate method of checking is by using an instant-read thermometer. The internal temperature of a fully cooked chicken breast should be 165 degrees Fahrenheit (or 74 degrees Celsius). If you don’t have a thermometer, another way to check doneness is by examining the color and texture. The meat should be fully white without any pinkness, and the juices should run clear, not reddish or pink.
Be sure to let your chicken rest for a few minutes after cooking to ensure the juices redistribute properly and the meat remains tender and flavorful.

Safety Precautions & Clean Up
Precautions while Using an Air Fryer
Usage of any kitchen appliance demands caution, and air fryers are no different. Always ensure that the air fryer is placed on a flat and heat-resistance surface, away from any flammable materials. Be careful not to overcrowd the food in the basket, as this can lead to imbalance when sliding it back into the fryer. Never leave the fryer unattended when it’s in use. While using cooking sprays, refrain from spraying directly into the air fryer basket as the aerosol can damage the non-stick coating.
Handling the Hot Basket After Cooking Thin Chicken Breast
The air fryer becomes extremely hot during and after operation. It is essential to use heat-resistant gloves or tongs when handling the hot basket. After cooking, let the air fryer cool down for at least 10 minutes before attempting to remove the basket. Always support the bottom of the basket when transporting or handling it.
Waiting Time Before Clean-Up
After use, an air fryer requires a cooling period before you initiate the cleaning process. The ideal waiting time is 30 minutes. This time allowance protects you from burns that could happen while cleaning a hot appliance, and it also allows stuck-on food particles to soften, making them easier to remove.
Cleaning Your Air Fryer After Cooking Thin Chicken Breast
Regular cleaning of your air fryer elongates its lifespan, enhancing performance and food taste. Start by unplugging the air fryer. Remove the basket and pan from the fryer and wash these pieces separately with warm, soapy water and a soft sponge. Avoid using harsh cleaning tools, which could damage the non-stick surface.
If food particles are still present, soak the basket and pan in warm soapy water, then scrub gently. Rinley the pieces with warm water and dry them thoroughly before reassembling them into the air fryer.
The main unit of the fryer should never be submerged in water. Instead, clean it by wiping the interior and exterior surfaces with a damp cloth. If necessary, use a soft toothbrush to clean vents or hard-to-reach areas. Once the air fryer is clean, ensure it’s bone dry before the next usage. This cleaning routine should occur after every use to maintain the condition and efficiency of the air fryer.
By observing these precautions, handling techniques, and cleaning methods, you will ensure the safe and efficient operation of your air fryer for a prolonged period.
With proper insights and practice, anyone can master the art of air frying thin chicken breasts flawlessly. Matters of food safety and cleanliness go hand in hand with cooking, and as such, by the end of this guide, you’ll be adept at handling the hot components of an air fryer safely and executing the ideal cleanup. Not only will these skills elongate the life span of your appliance, but they will also ensure that your cooking experience is safe, seamless, and enjoyable. Armed with this knowledge, you’re well on your way to becoming an air frying aficionado, delivering perfectly cooked thin chicken breasts every time.


